Table of Contents
After learning the basics of choosing and buying orchids, watering, and feeding, it's time to go to the next step — repotting orchids.
Even for regular gardeners, repotting orchids can sound intimidating. After all, you're going to have to mess around with your plant and for new hobbyists, orchids give off the impression of being fussy and sensitive.
Surprisingly, orchids are hardier than they look. Just follow the simple steps below and you'll see that repotting is actually a cinch.
But before that, let's find out when it's the wrong and right time to repot.
Repotting Orchids

When you should leave your plant alone
As a beginner, you should avoid repotting your orchids during these times:
When you've just brought your orchid home from the store;
When it is blooming;
Or during the winter months as it is dormant then (best time is spring)
Pro-tip: It is NOT ideal to repot an orchid if it stressed. Even human beings don't like being bothered when stressed.
When to repot
The following are signs that you need to change your plant's media and/or container already:
When your orchid's roots are growing out of the pot
When the plant itself is already too big for its container
When the potting media begins to break down, i.e. soggy and not doing its job of draining moisture properly
Pro-tip: It is ideal to repot right after flowering when your orchid starts to produce new growth.
Preparing Your Potting Mix

Sample potting media. Clockwise from one-o-clock: tree fern, lava rock, Aliflor, sphagnum moss, osmunda, rockwool and fir bark in the center. (American Orchid Society)
It is important that you know the best type of potting media for the specific type of orchid that you have. If you purchased it from a nursery, get this info before exiting the store. Or, if it's a gift, ask your benefactor or harness the power of Google. Remember that you can either purchase your mix or DIY your own.
Once you've identified the best potting mix for your baby, you'll need to prepare it before the actual repotting. This will make your potting media more effective in both holding and draining moisture.
Here's how:
Find a big bucket for your mix. Ideally, the size should be twice that of your potting mix.
Fill it up with hot water for better absorption. Pour in your mixture.
Let soak overnight.
The following day, strain the soaked mix. Use a strainer or colander to drain off excess water.
While draining the mix, take time to rinse off any foreign particles or dust that has gotten into the mix.
We're finally ready to commence repotting.
How To Repot Orchids
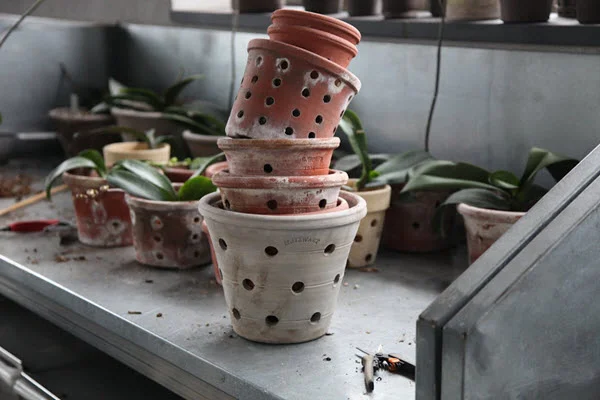
Photo Credit: Garden Therapy
Materials:
Potting media
Orchid pot
Scissors or knife
Pieces of terracota or styrofoam peanuts
Instructions:
First, sanitize.
Orchids are sensitive to germs and bacteria. To avoid diseases and damage, soak your planter and tools in a cleaning solution of a half cup of household bleach and 1 gallon water (or your favorite organic cleaning solution). Wash your hands with soap and water beforehand too.Get the plant out of its pot
Be gentle but if the roots are plastered onto its old pot, you'll have to use a (previously sanitized) knife or scissors.Remove old potting mix and rotting roots
This is your chance to clear off unhealthy matter that's stuck to your plant. Pick out old and rotting potting media. Cut away dead, limp, or rotting roots.Prep your new pot
The size of the pot you will use will be determined by the condition of your orchid. If healthy, use a pot one size larger. If unhealthy, as in the roots are in bad condition, use a same-size container or a smaller one. A smaller pot will keep the potting mix less damp and help keep root rot at bay.
If you are re-using a pot you've used with your other plants before, sterilize with boiling water for disease-prevention. You can also place packing peanuts, styrofoam pieces or terracotta pieces at the bottom of your pot for better drainage.Move the orchid to its new pot
Position your orchid so that the base is right at the top of your potting medium. The older roots should be at the bottom of the post and the growing roots at the sides so that they will have room to grow and fan out.
Pro-tip: If your orchid is a sympodial orchid, you can divide it into separate clumps so long as you have at least 3 pseudobulbs and healthy roots for each group.Add in your potting mix
With your thumbs and forefingers, press in the new potting material into your container. A handy trick is to use chopsticks to get planting medium in the areas between your roots if your fingers are too big or clumsy.Secure your orchid
Keep your plant from wiggling and tilting by staking it upright. Alternatively, you can use orchid clips to keep it in place until new roots grow and anchor themselves to the plant's new pot.Mist or water thoroughly
Keep your baby misted or watered for at least a week until the new roots finally appear.
And you're done! The more you gain experience in repotting, the more you'll realize how easy it is. Good luck!